Hello all! Let me introduce myself to you - I'm Rachel, of OH NO Rachio! and I'm pretty thrilled to be here over on the ever gorgeous Poppytalk.
Today I'm sharing with you my simple, yet rather lovely 'confetti' style duvet cover tutorial. So often gorgeous bedding seems to cost the earth - yet it really does make a difference to the look and feel that you're trying to create in a bedroom. Especially if you've just headed off to College and want to make your dorm feel more like home!
So without further ado, here's how you can make your own custom luxury bedding without breaking the bank! Enjoy!
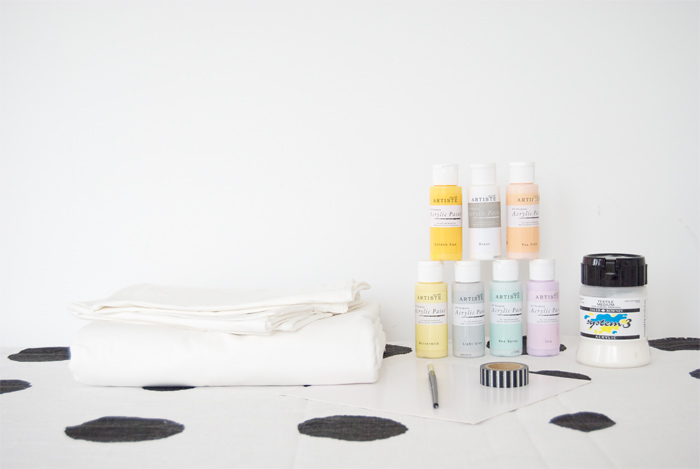
You will need:
• Cotton duvet cover set
• Acrylic Paints
• Fabric Medium {widely available online}
• Paintbrush
• Pencil
• Something circular to use as a template {I used a roll of washi tape}
• Large piece / pieces of cardboard to pop in between your fabric
• {Optional} Iron
1//. Lay out your duvet cover on a flat surface and decide how far up you want your confetti pattern to go. Then start placing down your circle template and lightly drawing around it with your pencil. I wanted the pattern to look fairly random so I actually did a little bit of throwing the wash tape up in the air and then tracing around it wherever it landed to make sure I didn't make my pattern too uniform.
2//. Once you're happy with your confetti pattern, pop your cardboard inside your duvet cover to protect the other side from getting paint on it and to protect your table top too!
3//. Take your acrylic and your fabric medium - the fabric medium simply helps to make the acrylic more colourfast in the wash - now you can of course use fabric paints for this but I can never seem to find them in very pretty colours - so I opted for this technique.
You want to mix your fabric medium into your paint 1:1 - so the same amount of each. They blend easiest if you start with the fabric medium and add a small amount of paint, gradually adding more.
4//. Once you've mixed up your paint to the desired colour you can just go for it and start painting your little circles. A tip is to go very slightly outside the pencil line so that you won't see the outlines once dry.
I mixed up the colours a lot to give my cover a nice range of pastel tones, but you can obviously choose any colour combination that you like.
5//. As you go along, try to every now and then lift the cover from the backing cardboard to make sure that it doesn't stick as it dries.
6//. Allow to dry and then you're ready - I ironed my cover set as I found that as the fabric paint dries it can bunch up the cover a little.
You're done! It's so simple, then you can just repeat the same process for your pillow cases too!
I hope you enjoyed my little tutorial!
Rachel
Follow Rachel online:
Site
Blog
Shop


